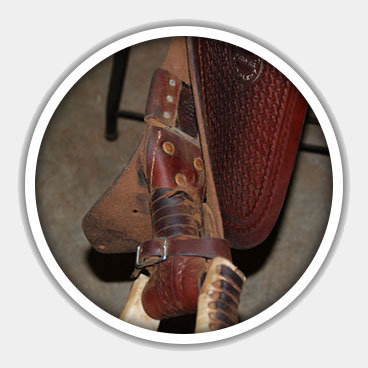
How to Turn Your Stirrups
How to turn your stirrups
After a long trail ride and the resulting achy back or creaky knees, we all realize the importance of ergonomics. One of the most frustrating things about a saddle, especially for those riders with weak knees or ankles, can be unturned stirrups. How many times have you sat in your saddle, flailing your foot, searching for the stirrup? The problem is easy to solve if you know what to do.
Many saddle manufacturers offer pre-turned stirrups, eliminating this problem right off the bat. Billy Cook and Crates saddles come with turned stirrups. Other companies, like Circle Y and Reinsman, have saddles built with such soft leather that is quite pliable, reducing the effort and time of turning the stirrups. But most manufacturers allow you to figure it out yourself. Some ask you to pay extra for the service. But with minimal time and effort, you can do it yourself. Try one of these easy ideas:
Option 1
There are a few products that you can easily attach to the fender to keep the stirrup permanently in the correct position. Stirrup Straight is attached between the fender and the stirrup with a stainless steel swivel in between. The stirrup will hang off-center, putting the fender and stirrup forward so that you can easily locate it and slide your foot into it.
No more ankle and knee stress. No more groping around with your feet. However, a product like Stirrup Straight will add a couple inches to your fender length. Do add extra length.
Option 2
Most riders use the broom handle trick. To do this, follow these steps:
- Place your saddle on a saddle stand.
- Twist the stirrup to the desired position. Run a broom handle or s 2 x 4 through the stirrup under the saddle to the other stirrup. The pair should be resting the direction you want them to be while riding.
- Allow the saddle to rest in this position. It may take quite a while for the stirrups to end up staying this way. Many riders replace the broom handle after each riding session, and this keeps the stirrups trained.
- Additionally, you can add weight to the broomstick or 2x4 with bricks, blocks, or weights keeping the stirrups straight and trained at the same time.
For a more permanent effect, some riders choose to wet the stirrup leathers, then let the broomstick rest in the stirrups until the leather dries. This nearly always permanently turns the leathers, eliminating the need to keep retraining the stirrups.
To try this, remember to remove the stirrup leathers, use completely clean water, and apply leather conditioner during and after the process. However, remember that water is not good for leather, as it dries it out and allows the natural fats and conditioners to leave the leather. The more the leather gets wet, the more it loses its natural softness and flexibility. Some leather may also discolor if it gets wet.
Option 3
Try a twisting method that many saddle makers use. The following are directions for a permanent stirrup twist. You'll need an extra leather saddle string and an extra set of hands.

|
Directions
|